I know this is kind of late to be posting this, but no new recipe this week. One of my dear friends from high school passed away quite suddenly on Sunday, January 9th. This whole week has been really hard on me, and as the funeral was yesterday, I really don't feel like cooking.
I am planning on trying out a new recipe next week, just don't know what yet.
See ya'll in the kitchen.
Saturday, January 15, 2011


Thursday, January 6, 2011
Tamale Pie
One of my New Year's Resolutions is to try one new recipe a week. Which means, my loyal readers, you get a new recipe once a week. I'll also throw some of my tried-and-true recipes in there for good measure. This week, you're lucky. You get two recipes! Isn't that exciting!?
Dylan and I love Mexican food. Sometime down the road I want to try making some authentic Mexican dishes, but for now, I settled on this tamale pie. Whenever I go to a Mexican restaurant, I have to have a tamale, so this particular dish sounded amazing to me. You ready? Let's start cooking!
Ingredients
Dylan and I love Mexican food. Sometime down the road I want to try making some authentic Mexican dishes, but for now, I settled on this tamale pie. Whenever I go to a Mexican restaurant, I have to have a tamale, so this particular dish sounded amazing to me. You ready? Let's start cooking!
Ingredients
- 2 teaspoons vegetable oil
- 1 medium onion, chopped
- 1 pound ground beef chuck
- 1 tablespoon chili powder
- 1 teaspoon ground cumin
- 1 cup medium-hot salsa
- 1 can (15 1/4 to 16 ounces) whole-kernel corn, drained
- 4 cups water
- 1 cup cornmeal
- 1 teaspoon salt
- 2 ounces Cheddar cheese, shredded (1/2 cup)
Directions
- Preheat oven to 350°F. In nonstick 12-inch skillet, heat oil over medium-high heat; add onion and cook until tender and golden, about 5 minutes. Stir in ground beef and cook, breaking up meat with side of spoon, until meat is browned, about 5 minutes. Skim and discard any fat. Stir in chili powder and cumin and cook 2 minutes longer. Remove from heat and stir in salsa and corn.
- In 2-quart saucepan, heat water to boiling. With wire whisk, gradually whisk in cornmeal and salt. Cook over medium heat, whisking frequently, 5 minutes
- Pour half of cornmeal mixture into shallow 2-quart casserole. Spoon beef mixture over cornmeal; spoon remaining cornmeal over beef and sprinkle Cheddar on top. Bake 45 minutes. Remove casserole from oven and let stand 15 to 25 minutes before serving. Makes 6 main-dish servings.
My Take
Now, as I've mentioned before, Dylan and I are very picky eaters. I think he's more picky than I am, but whatever. So, when I saw this contained onions, I, for a second, grimaced. Onions are one of my most disliked foods, but I love the flavor they can add to foods. So I got the bright idea that I could chop it up really fine and we would never notice. So I sliced half of a small onion and put it in my Magic Bullet. Er...it didn't turn out like I had planned. I think I used the wrong blade, so instead of being finely chopped, it came out as onion paste.
Okay, there was no way I was going to mix that with my meat, so instead I heated up the oil and cooked the onion paste a bit, just trying to get some of the flavor into the skillet. I think it kinda worked, but there were onions in the salsa, so I wasn't freaking out about it too much.
Another problem I ran into was I don't think it was done when I pulled it out. It might have had something to do with the fact that I didn't have a "shallow" casserole dish. The cornmeal wasn't completely set up. It wasn't firm, but it wasn't really watery either. It was just slightly gooey. I thought it was kind of hard to tell if it was done or not. It tastes fine, though, so I guess it turned out okay. It tasted really yummy.
I think next time I make this, I'm going to use a pound of turkey instead of the ground chuck. :)
Monday, January 3, 2011
Mexican-Style Spareribs
Alrighty, so I've tried cooking these ribs twice and what I've learned: Don't cook them on the grill! I found that alcohol and fire don't mix so well. Heh...should be obvious, ya? Anywho, this is a very good twist on the typical barbecue ribs.
Ingredients
Ingredients
- 1 cup firmly packed fresh cilantro leaves and stems
- 1/2 small onion, thinly sliced
- 4 garlic cloves, crushed with garlic press
- 1 pickled jalapeño chile
- 1/2 cup fresh lime juice
- 1/4 cup fresh orange juice
- 1/4 cup tequila
- 1 tablespoon olive oil
- 2 tablespoons sugar
- 1/2 teaspoon dried oregano
- 3 pounds pork spareribs
Directions
 |
| The sauce all mixed up |
- Preheat oven to 350°F
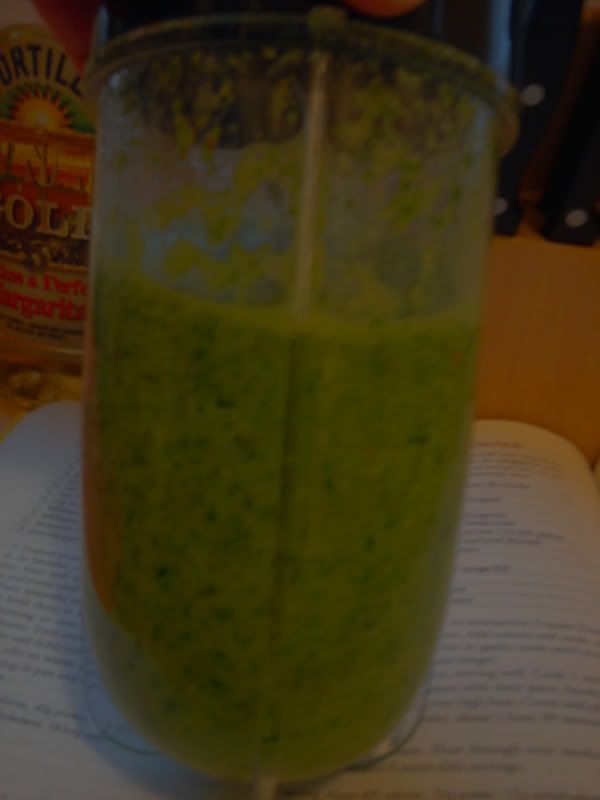
- In blender, combine cilantro, onion, garlic, pickled jalapeño, lime, and orange juices, tequila, oil, sugar, and oregano and puree until smooth.
- Place spareribs in nonreactice roasting pan just large enough to hold them in single layer. Pour cilantro mixture over ribs, turning to coat well. Roast, turning ribs twice, 1 hour 30 minutes. Turn oven control to 450°F and roast ribs until very tender and richly colored, about 20 minutes longer.
- Transfer ribs to warm platter. Skim and discard fat from sauce remaining in pan and spoon sauce over ribs.
- Makes 4 main-dish servings.
My Take
These turned out pretty well the second time. As mentioned before, I wouldn't advise cooking them on the grill, as the tequila in the mixture makes the flame jump up and char the ribs. They turned out much better in the oven. I liked how the flavors all came together and all that. Delicious and different than your typical spareribs. The only problem I had was the sauce in my pan burned around the edges, so I couldn't really pour the left overs on top of the ribs, but there was enough left on the ribs that you could taste it.
Since there's only two of us, there is more than enough left over for left overs. ^_^
Tuesday, December 28, 2010
A Query for My Readers
Alright, I've been a bit busy with the holidays and the like, so I haven't had time to finish up some posts that I've had sitting around. Don't worry, they'll be up in the new year, I promise!
Okay, so I have a question for you. What would *you* like to see on here? Be it recipes, how-to's, or whatever. Just lemme know. The reader is always right. Well...mostly right. I would love to hear your suggestions and comments!
Okay, so I have a question for you. What would *you* like to see on here? Be it recipes, how-to's, or whatever. Just lemme know. The reader is always right. Well...mostly right. I would love to hear your suggestions and comments!
Saturday, December 18, 2010
Candy Cane Cookies
Another holiday treat which I'm trying for the first time this year. They didn't quite go as expected, which I'll explain under the My Take heading. They tasted really yummy, though.
Ingredients
Ingredients
- 1 cup shortening, softened
- 1 cup powdered sugar
- 1 egg
- 1 1/2 teaspoon peppermint extract
- 1 teaspoon vanilla
- 2 1/2 cups flour
- 1/2 teaspoon salt
- 1/2 teaspoon red food coloring
- Sugar
Directions
Preheat oven to 375°F. Mix shortening, powdered sugar, egg, and flavoring extracts. Add flour and salt, and blend together. Divide dough in half. Add red food coloring to half. Roll a 4 inch strip from each half. Twist together and make a candy came. Sprinkle with sugar. Bake for 10 minutes.
My Take
Okay, as I mentioned above, these did not turn out well at all for me. If you follow me on Facebook, you'll probably remember my rantings on these cookies via my status updates. The dough tasted great and all, but trying to keep it together, well, that didn't go so well. I think part of my problem was that I accidentally doubled the recipe 'cause I didn't realize my mom's measuring cup for dry ingredients was for 2 cups instead of 1. So I had to go back and double the recipe which meant I had to add more shortening to my already floured dough. So, that might have had a hand in the annoyances of these cookies.
Because the dough was so dry, I had problems forming the candy canes. I could kind-of-sort-of twist the two colors of dough together, but when I tried to put the crook into it, they broke apart. My first couple of attempts kind of reminded me of a third-grader's clay project or something. I mean, these things were huge and, in my opinion, ugly. :-/
So, I came up with another idea to put them together which involved setting the two colors side-by-side and then rolling them together into a "snake" and then manipulating it into a candy cane. That worked much better, but it was so time consuming and it was getting close to 9 o'clock at night, that my mom and I decided to just throw the 2 colors together, make it look kinda marbled, roll the dough out, and cut them out with candy cane-shaped cookie cutters. That worked much better, but it was still kinda hard because of the dryness of the dough. We also added more peppermint 'cause we couldn't taste the peppermint. I still can't, but my mom said she could.
So, those are my adventures with these candy cane cookies. Next year, I'm just going to make a simple sugar cookie recipe and add peppermint extract and do the whole dough thing. I think/hope that'll turn out better.
Lemme know what you think and if you decide to try this. If you get it to work, lemme know what you did differently (you know, like not accidentally double the recipe.)
Okay, as I mentioned above, these did not turn out well at all for me. If you follow me on Facebook, you'll probably remember my rantings on these cookies via my status updates. The dough tasted great and all, but trying to keep it together, well, that didn't go so well. I think part of my problem was that I accidentally doubled the recipe 'cause I didn't realize my mom's measuring cup for dry ingredients was for 2 cups instead of 1. So I had to go back and double the recipe which meant I had to add more shortening to my already floured dough. So, that might have had a hand in the annoyances of these cookies.
Because the dough was so dry, I had problems forming the candy canes. I could kind-of-sort-of twist the two colors of dough together, but when I tried to put the crook into it, they broke apart. My first couple of attempts kind of reminded me of a third-grader's clay project or something. I mean, these things were huge and, in my opinion, ugly. :-/
So, I came up with another idea to put them together which involved setting the two colors side-by-side and then rolling them together into a "snake" and then manipulating it into a candy cane. That worked much better, but it was so time consuming and it was getting close to 9 o'clock at night, that my mom and I decided to just throw the 2 colors together, make it look kinda marbled, roll the dough out, and cut them out with candy cane-shaped cookie cutters. That worked much better, but it was still kinda hard because of the dryness of the dough. We also added more peppermint 'cause we couldn't taste the peppermint. I still can't, but my mom said she could.
So, those are my adventures with these candy cane cookies. Next year, I'm just going to make a simple sugar cookie recipe and add peppermint extract and do the whole dough thing. I think/hope that'll turn out better.
Lemme know what you think and if you decide to try this. If you get it to work, lemme know what you did differently (you know, like not accidentally double the recipe.)
Wednesday, December 15, 2010
Egg Nog Cookies
Now, I personally don't like egg nog, but my mom, brother, and husband love it, so when I ran across this recipe, I knew I had to try it for the holiday season. Just got done baking and frosting them last night. Keep reading to see how they turned out!
Ingredients
Ingredients
- 1 cup butter/margarine, softened
- 2 cups sugar
- 1 cup eggnog
- 1 teaspoon baking soda
- 1/2 teaspoon nutmeg
- 5 1/2 cups flour
Frosting
- 3 cups powdered sugar
- 1/4 cup butter/margarine, softened
- 1/3 cup eggnog
Directions
Beat butter and sugar until fluffy. Add eggnog, baking soda, and nutmeg; mix well. Gradually add flour, mixing well. Chill overnight. Roll out to 1/2" thick. Bake at 375°F for 8-10 minutes or until lightly browned. Cool completely.
Frosting: Beat powdered sugar and butter until well blended. Gradually beat in eggnog until icing is smooth. Spread on cooled cookies.
My Take
As mentioned before, I myself do not like eggnog, but I love these cookies! My mom and Dylan both said they taste like eggnog, so I guess that's good.
The only thing I changed about this recipe, was that I didn't really feel like frosting the cookies, so I tried to make a glaze out of it. Putting butter in the frosting didn't help, so my mom and I made a glaze with powdered sugar, eggnog, and some milk. Couldn't tell you the exact proportions, and that seemed to work out well. Takes a lot less time than frosting the many cookies we had! These turned out *a lot* better than the candy cane cookies which I'll post about later (either later today or tomorrow).
So, those are the Egg Nog Cookies. Lemme know what you think and how yours turned out!
As mentioned before, I myself do not like eggnog, but I love these cookies! My mom and Dylan both said they taste like eggnog, so I guess that's good.
 |
| The cookies with the glaze (dozes and teddy bears) |
So, those are the Egg Nog Cookies. Lemme know what you think and how yours turned out!
Friday, December 10, 2010
Quick and Easy Chicken & Cheese Quesadillas
This is a "recipe" which my mom and brother made up. It makes for a great weekend meal for when you can't think of anything else to cook. I discussed this with one of my friends and she makes a yummy-sounding one as well, but it's more work and, since Dylan and I are extremely picky eaters, this one works well for us. Maybe Cassie will grace me with her prescence on my blog and give her recipe. ^^ Oh, and there aren't exact measurements (except for the chicken) as I do this all by sight.
Ingredients
Ingredients
- 2 (13 oz) canned chicken breast
- Shredded colby jack cheese
- Taco Seasoning
- Tortillas
Directions
- Drain the juice/water from the canned chicken breast. Then place the chicken in a bowl. With a spoon, "mash" the chicken until it has become shredded
- Add cheese to chicken. I do it all by sight. I like to have just over half-and-half. You kinda just have to experiment and see what you like the best. I think you need just a bit more cheese than chicken, otherwise, it won't melt shut right.
- Add taco seasoning to taste. I like to make sure that everything is lightly covered.
- Cook one side of a tortilla until it is barely brown. You don't want it crunchy, as then you won't be able to fold it over.
- Flip tortilla and put filling on half. Fold it over and cook both sides until lightly browned, making sure the filling is nice and melted.
- Enjoy!
My Take
I loooove this recipe. Feel free to experiment, and if you want, measure how much cheese and taco seasoning you put in and lemme know. Like I said, I never measure with this, but I figured I would stick it up here anyway and let you guys have a go at it. Also, lemme know if you try it with any other fillings.
Oh! And if you want, you can cook it like a grilled cheese sandwich, using 2 tortillas and not folding it. Then you can cut it into wedges and serve it at a party.
The filling also tastes great warmed over tortilla chips; kinda like chicken nachos.
Okay, so lemme know what you think, and please, feel free to comment. I <3 comments. ^.^
Subscribe to:
Posts (Atom)